If you experience slowdowns in your PC's performance, especially when gaming or working with video editing programs, the problem most likely lies with the GPU overheating.
You often focus on the CPU or RAM as the main culprits for these types of problems, but did you know that the graphics card can also be affected by excessive temperatures? This is where the GPU fan curve.
What exactly is the GPU fan curve and why is it so important?
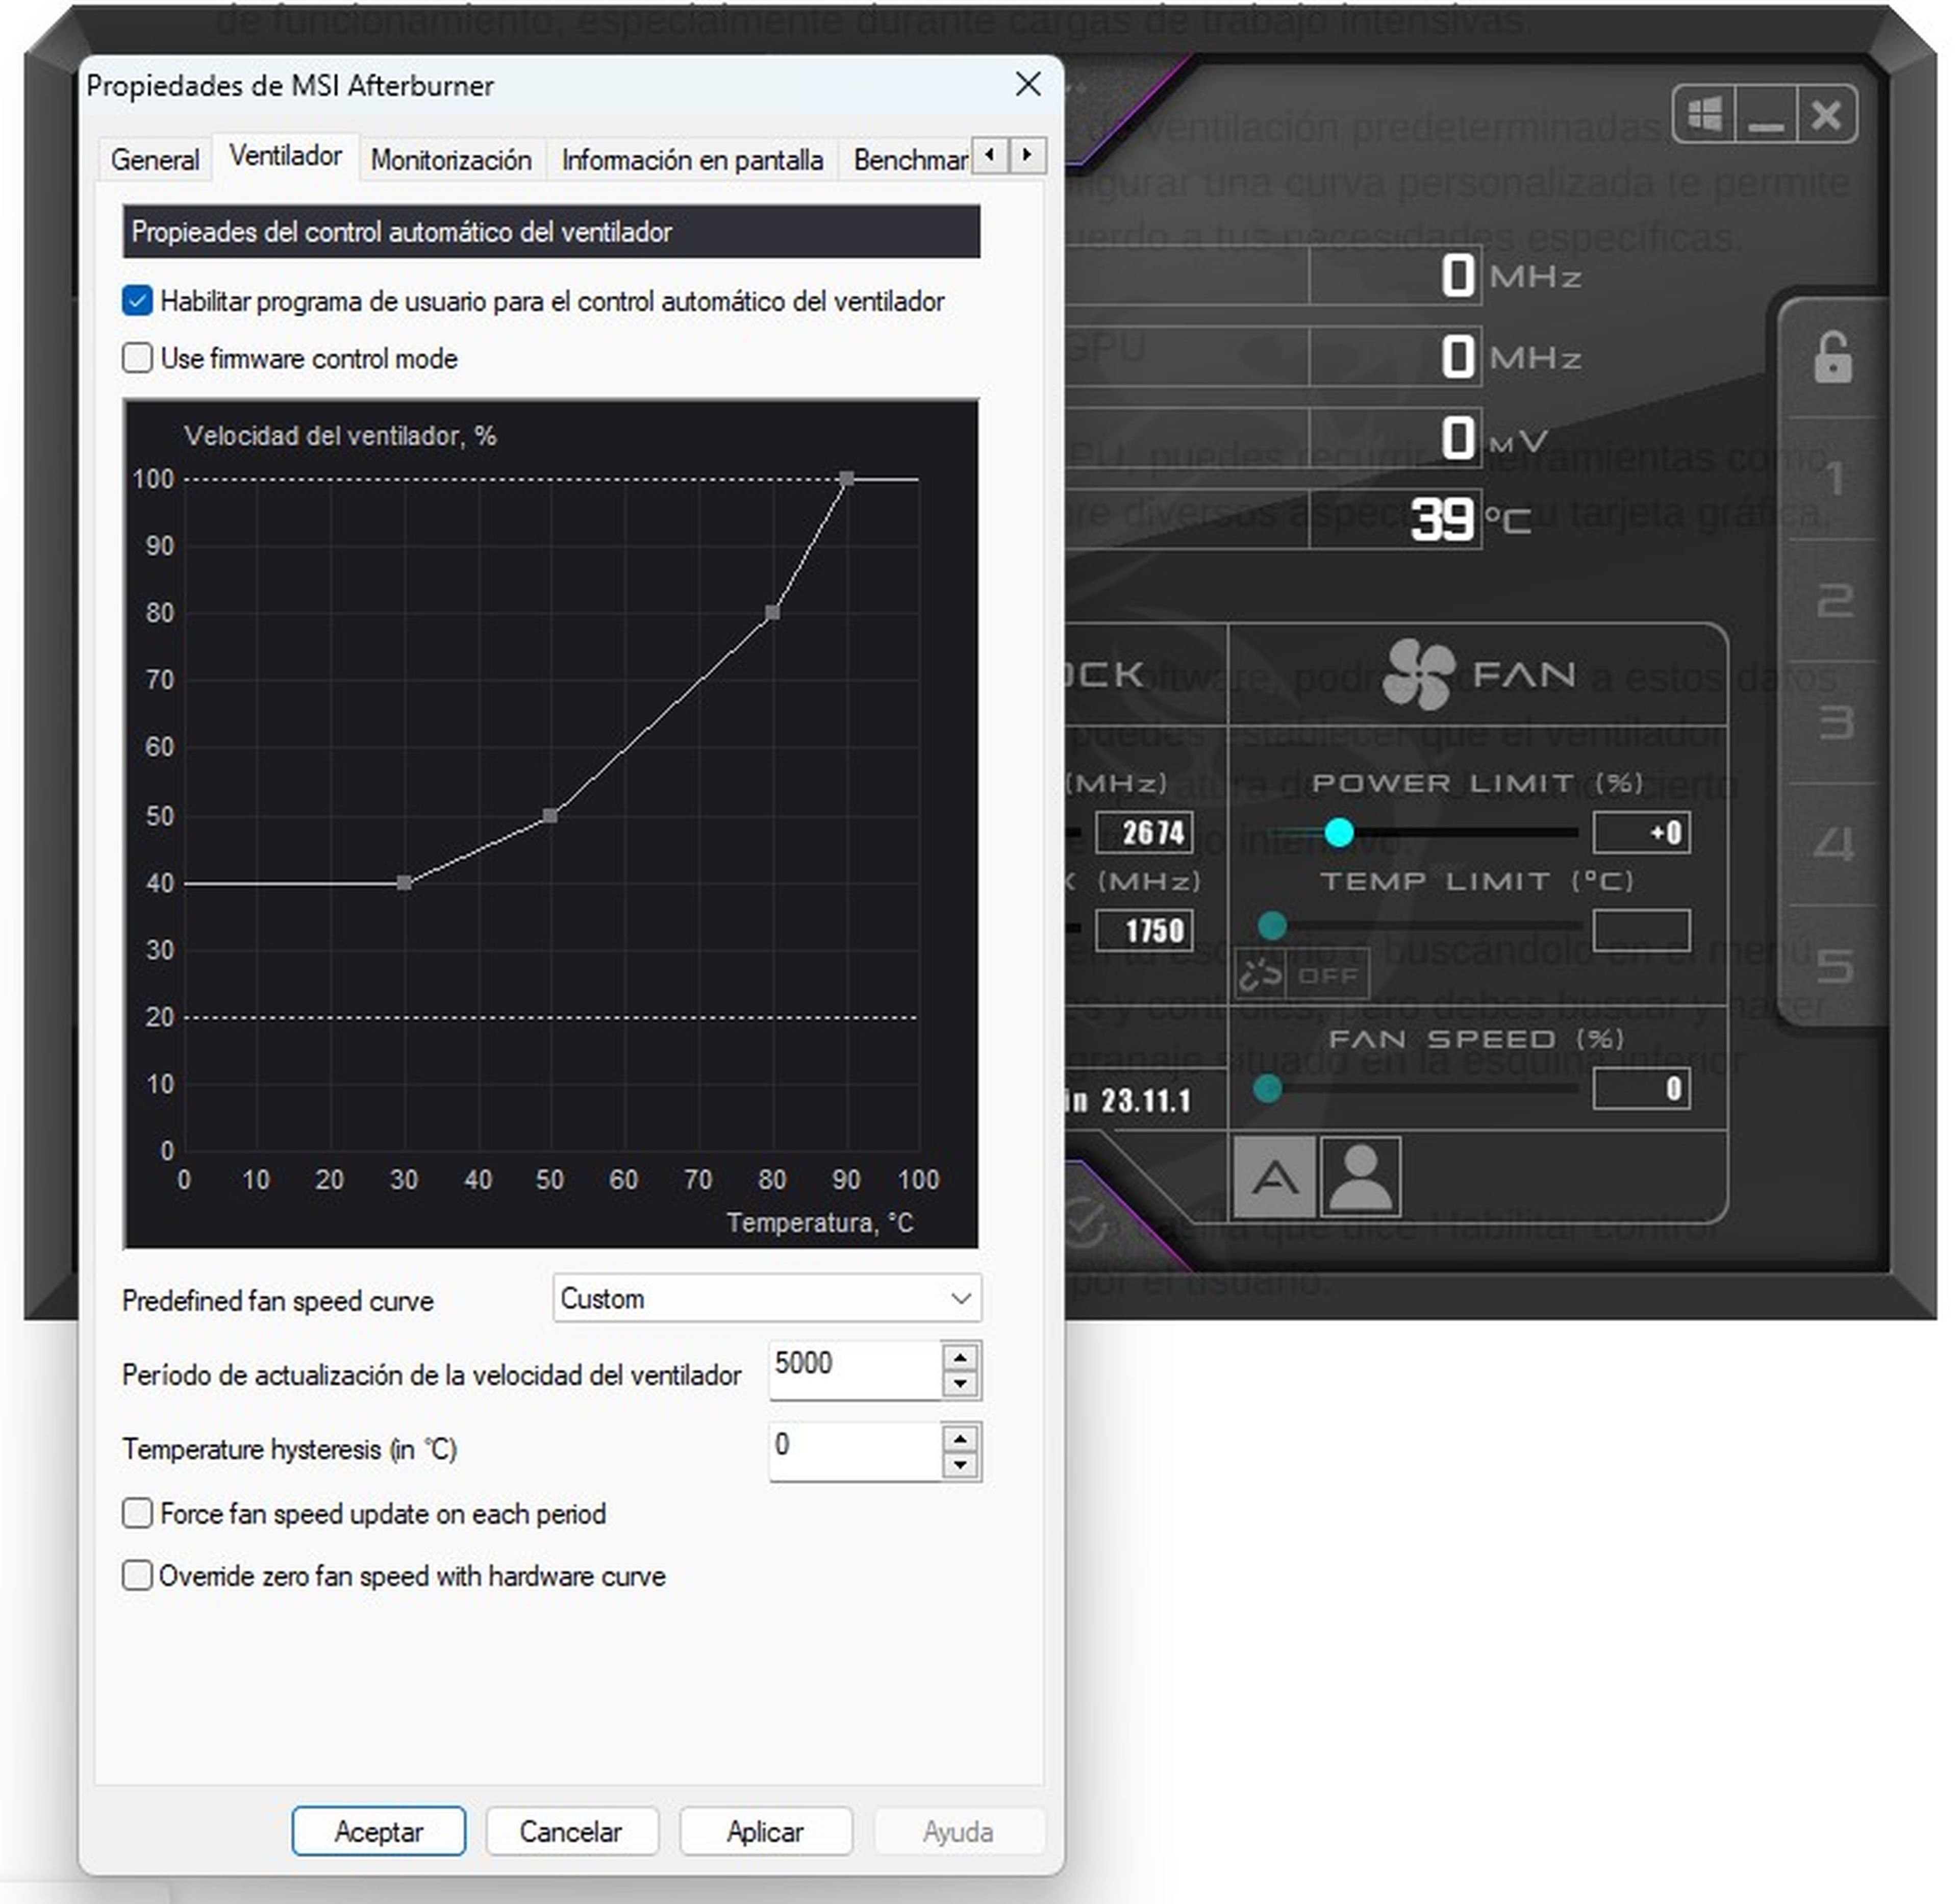
In essence, The fan curve is a graphical representation of the behavior of your graphics card's fan.. Plots the speed of this component as a function of GPU temperature.
When the temperature increases, the fan speeds up to dissipate heat, and when the temperature decreases, the fan slows down to maintain an adequate level of operation.
In summary, ensures that this component maintains optimal temper at all times, which helps prevent overheating and performance drops. It is a vital tool for keeping your GPU in optimal operating condition, especially during intensive workloads.
Although many manufacturers set default ventilation curves, these may not be the most efficient. Thus, Setting a custom curve allows you to adjust the fan behavior according to your specific needs.
How to configure the fan curve of your GPU
To configure the fan curve of your GPU, you can use tools such as MSI Afterburnerwhich gives you full control over various aspects of your Graphic cardincluding fan speed.
Once you have downloaded and configured the software, you will be able to access this data and adjust according to your preferences. For example, you can set the fan to run at a higher speed when the GPU temperature reaches a certain threshold, which will help during intensive work sessions.
Examples of different ventilation curve settings:
- Curve for silent operation: The fan speed remains low until the temperature reaches a certain threshold (e.g. 70°C). From that point, the fan speed gradually increases to keep the temperature under control.
- Curve for maximum performance: The fan speed is set to a high value from the start to ensure the GPU stays as cool as possible. This may result in increased fan noise, but maximizes performance.
- Balanced curve: Find a balance between fan noise and temperature. The fan speed gradually increases as the temperature increases, but does not reach maximum to avoid excessive noise.
Open MSI Afterburner from the shortcut on your desktop or by searching for it in the start menu. You will see an interface with several options and controls, but you must find and click the button Settingswhich is the gear icon located in the lower left corner of the main program window.
Now, select the tab Fancheck the box that says Enable user program for automatic fan control. Along with the option Predefined fan speed curvechoose Personalized in the drop-down menu where you will see a graphical representation of the ventilation curve in the window.

MSI Afterburner
Click anywhere on the curve to add a node and adjust the fan speed based on the GPU temperature. Drag the nodes along the curve to adjust the fan speed at different temperatures.
Once set up, click Apply and then in Accept to save the changes and close the settings window. With these steps, you will have successfully configured a custom fan curve for your GPU using MSI Afterburner.


![[Img #74692]](https://thelatestnews.world/wp-content/uploads/2024/12/What-do-11-and-12-year-old-boys-and-girls-300x200.jpg)