


What is sandbox software?
A sandbox software is an application that implements a virtualization technique to create an isolated and controlled execution environment within an operating system. This virtual instance, known as a “sandbox”, allows programs and processes to run safely and without affecting the main system environment. Any malicious program or any impact whatsoever on the guest operating system is completely isolated.
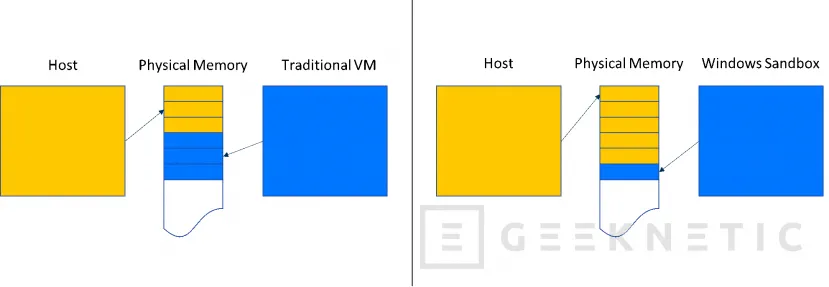
It requires an abstraction layer on which a virtual machine runs that will add resource consumption, but the advantage is that we will not alter, for better or worse, the operating system that hosts the Sandbox. It is not only good for testing suspicious software or software that we doubt but also any that we do not want to alter our main operating system.
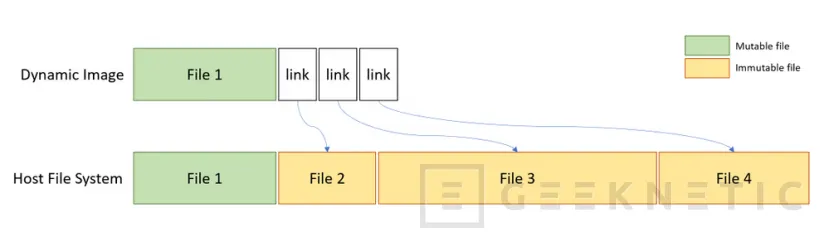
In the case of Windows Sandbox, it is done through the virtualization features incorporated into Windows 10 and Windows 11 in their professional and Enterprise versions. There are also other alternatives, for other operating systems, or in the form of specific applications for Windows, some free and others paid. The objective of all of them is to achieve an environment completely isolated from the main system and where each change and execution is completely reset in each restart of the sandbox, it is, therefore, not a normal virtual machine but a completely isolated and temporary testing mechanism.
In addition to their security function, sandbox software is useful for software testing and application development. They allow developers to test their applications in an isolated and controlled environment, without affecting the main operating system or other running programs.
In summary, a Sandbox software is an essential tool to ensure the security and integrity of the computer system by providing a virtualized and isolated environment for secure program execution, as well as for software testing and application development. A necessity for anyone who likes to tinker with their PC.
Prerequisites to install Windows Sandbox
To install Windows Sandbox, the following requirements are required:
- Operating System: Windows 10 Pro or Enterprise, version 1903 or later. Or any version of Windows 11 but also in its Pro or Enterprise variants, the Home versions do not have this feature.
- Processor: 64-bit CPU with at least two cores, although now we will give you the most optimal recommendations, which do not include processors with only two cores.
- RAM Memory: At least 4 GB of RAM is recommended, but this is only to run the Sandbox, what we put inside will have additional requirements that we will have to know how to assess.
- Storage: Enough free disk space to install Windows Sandbox, which is a trifle, and the applications that will run on it, which again will depend on our particular needs.
- Hardware virtualization: The processor must support hardware virtualization extensions, such as Intel VT-x or AMD-V.
- Virtualization enabled: Virtualization must be enabled in the computer’s BIOS or UEFI settings, and the processor must be compatible, of course.
It is important to note that Windows Sandbox is available only on the Pro and Enterprise editions of Windows 10, and may not be available on all versions or configurations of the operating system. Additionally, it is recommended to have the latest Windows updates installed to ensure optimal performance and compatibility with Windows Sandbox. There are options to have this same functionality in Windows other than these professional or business versions, but they go through third-party applications and that, friends, is for another story.
Now we go with the most reasonable configurations, which in my humble opinion would be the following:
- Processor: Modern mid- to high-end processors are best suited to run Windows Sandbox efficiently. 64-bit processors with multiple cores, 6 at least with 12 threads, and high clock speeds are preferred. Any Intel Core of recent generations, or also recent Ryzen, should work wonders in this environment without affecting the general performance of the host operating system, which is something that we will undoubtedly want to avoid.
- RAM Configuration: The amount of RAM required depends largely on the applications running within the Windows Sandbox. However, it is recommended to have at least 8 GB of RAM for optimal performance. For more intensive workloads or execution of multiple applications within the Sandbox, it is recommended to have 12 GB or more of RAM. We also do not create castles in a sandbox, for that we have other techniques.
In short, modern mid- to high-end processors with hardware virtualization technologies are best suited to run Windows Sandbox efficiently. A reasonable amount of RAM and proper sandbox usage are also keys to optimal guest and sandbox performance.
Installing Windows Sandbox
Installing it is really simple, we can do it through the console or through the “Enable or disable Windows features” utility. To use Powershell, we will use this command:
- We open Powershell from the Windows start button, type “Powershell” in the search and run it with administrator permissions using the right click on the icon or the descriptive text of the Powershell application.
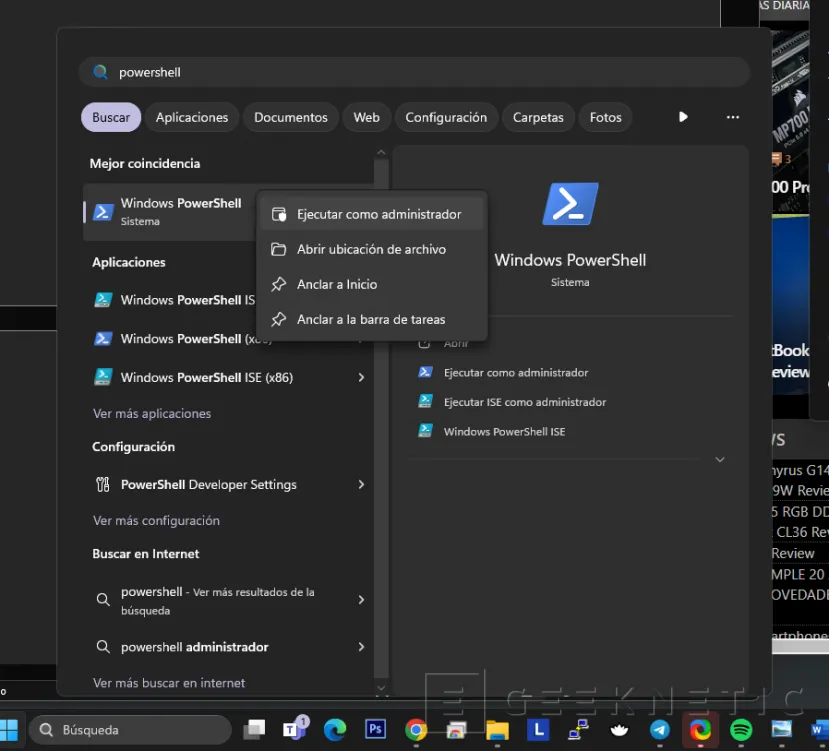
- Once opened we execute this command: Enable-WindowsOptionalFeature -FeatureName “Containers-DisposableClientVM” -All -Online
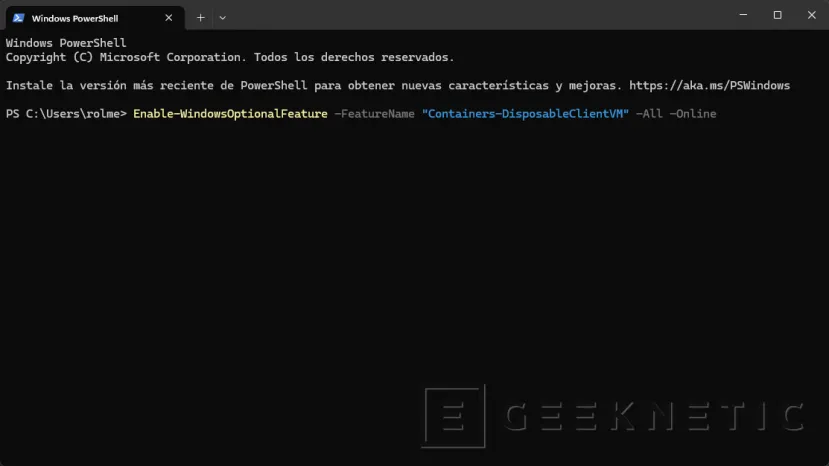
- We restart the computer when the process is finished, it will not be available until we execute this step.
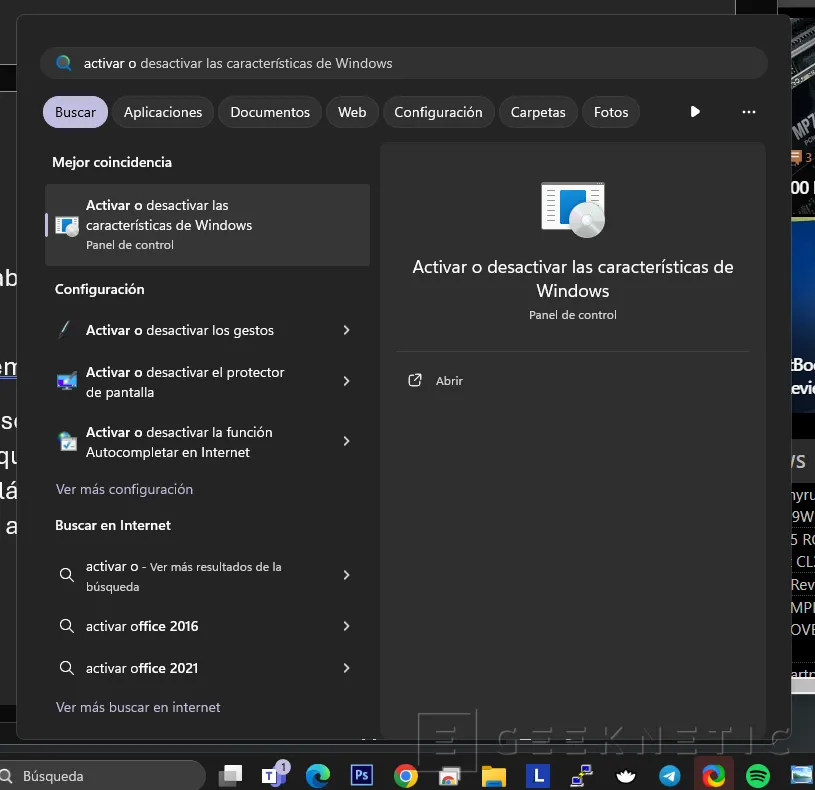
If we want to go the “easy” way we will follow these steps:
- Click the Start button and type “Turn Windows features on or off” in the search bar. We select the first option and a menu that is probably familiar to you will open, where we can enable or disable Windows’ own functionality, other than third-party applications.
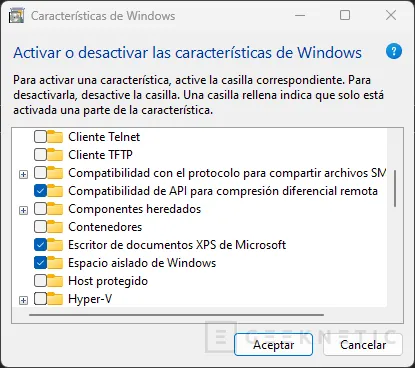
- In the window that opens, scroll down and search for “Windows Sandbox or Windows Sandbox” (it depends on the language of your operating system, Spanish is the second option). Check the box and we just have to accept and let the process finish.
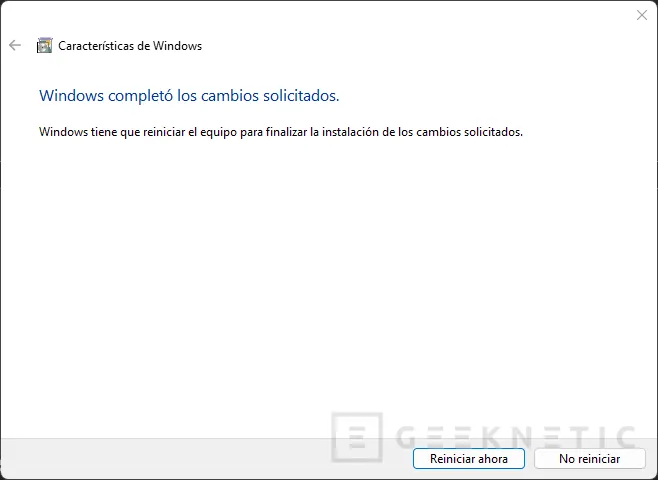
- We restart the computer when the process is finished, on a normal computer it does not take more than a minute, two at most.
How to use Windows Sandbox
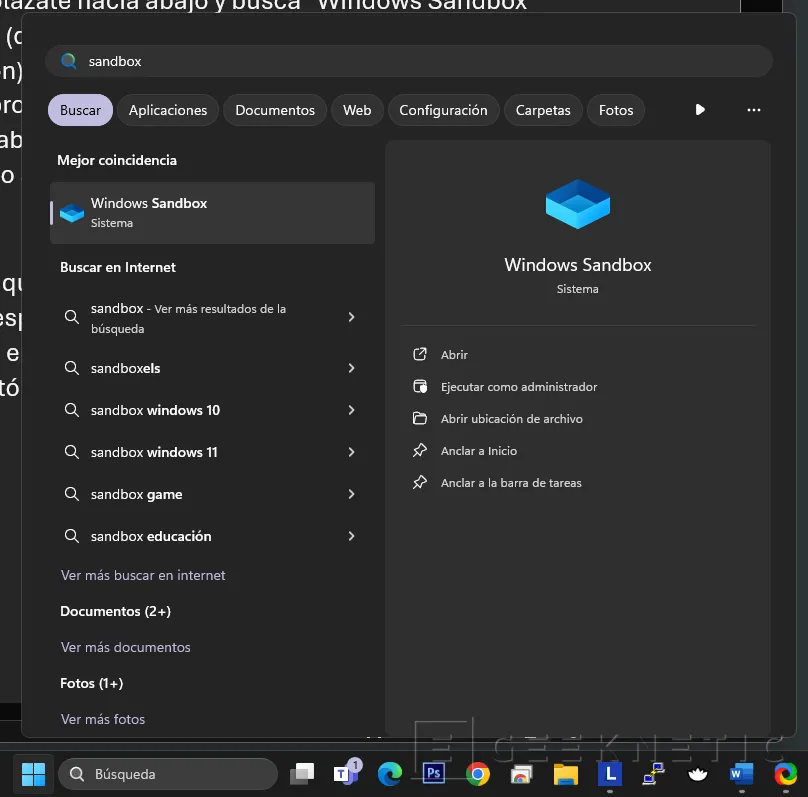
To use Windows Sandbox we only have to run the application that we have installed. Even if we have Windows in Spanish, and we have had to install it as “Windows Sandbox”, the way we will run it is by searching for “Windows Sandbox” in the Windows 10 or Windows 11 start button search engine.
The first execution is slower, due to installation and configuration issues, so a little patience, then its use is much more agile, it starts in a few seconds. It is also true that it already gives us everything preconfigured, without the need for a dedicated and complete installation with a Microsoft user, etc.
Perhaps what surprises us is that we find a fully functional Windows, in English and without a license, it is a completely virgin machine isolated from the main environment where we can do and undo without fear of affecting the host system.
Elements such as the screen size or resolution are automatically adjusted by changing the window size, it is a virtual machine with certain characteristics of its own, although the most critical is that every time we restart it will be completely virgin again, without any of the changes. that we have applied. If we want something more persistent, then a virtual machine with “snapshots” is the most suitable, this is for a quick test of a software or system configuration, testing, experimenting and restarting everything when finished.
This is how it works and it is really what is expected from this environment, it is not incompatible with the Windows 10/11 hypervisor so we can make it coexist with other modes of more specialized virtual machines and persistent configuration and data. This is a quick and very agile option to test that program that you don’t trust, that data whose origin is also dangerous to you, or even that application that you want to see how it behaves in a clean environment, etc.
Conclusion
If you are completely clear that this is a volatile environment, designed to give us a clean Windows image on each reboot, then you have a really useful tool to protect your main operating system from any threat.
You can open that email that you are not absolutely sure about, but you think it is important, try that application in beta phase that you are not sure about, that application that you are only going to see once and you do not want it to leave traces in your operating system , that update, that specific execution, anything that occurs to you where you also don’t want to go around installing new operating systems, making previous backup copies, etc.
A very useful and completely free tool that you can find on your Windows Pro or Enterprise. Being able to access very cheap licenses for both versions, I think that with things like this utility you can have another extra motivation to upgrade to a more powerful version of your Windows Home or simply get more out of your professional license.
End of Article. Tell us something in the Comments!


Add Comment