


Measuring the speed of your Internet connection is something we usually do when we feel that the network is slower than normal. Although there are many web pages available to perform this task, not all of them are accurate.
Excess advertising and the additional burden of using a web browser can affect the result. Fortunately, There is a quick and distraction-free alternative: using the command line interface (CMD) Windows.
In this article, you will learn how to measure the speed of your connection using a simple command in CMD and also how to do it with PowerShell, another equally functional option. This tool will give you more precise results, without interference, allowing you to directly know the download and upload speeds and other relevant data.
Steps to measure speed with CMD
CMD
When you use a speed test website, the browser and the advertising on it can interfere with the results, slightly reducing the accuracy of the measurements. Therefore, the use of CMD is an excellent alternative.
Being a lightweight tool with no pop-ups or ads, the impact on bandwidth is much lower. This means that the results you get are more reliable.
Furthermore, the Ookla CLI toolone of the most used for this type of tests, eliminates distractions from the website and offers us a clean and quick way to take the test. This way, you can know the real data of your connection more precisely.
First, visit the Ookla website and download its command line application (CLI). It is available for free and is very light. And then once downloaded, extract the file to an easily accessible folder.
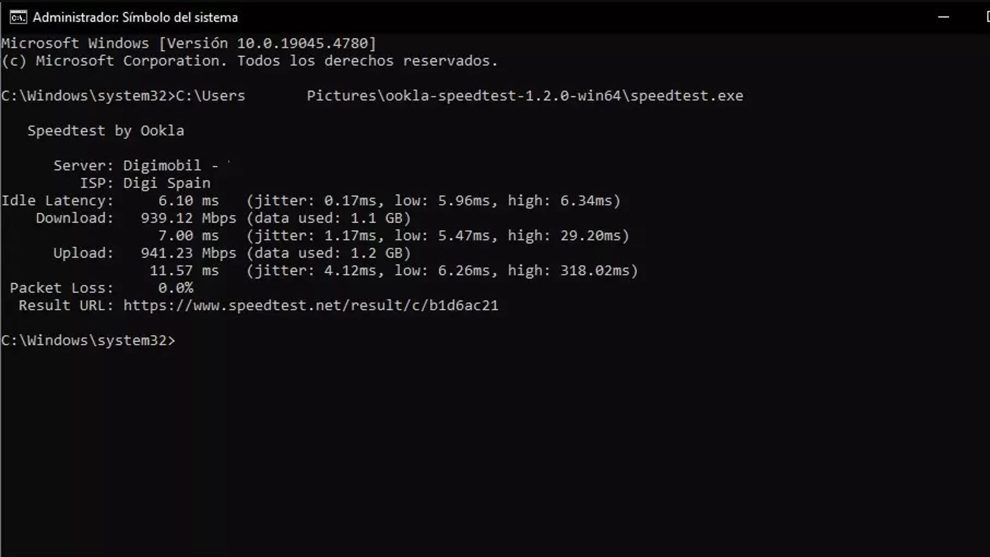
- Open the CMD: Go to Windows Search, type Command Prompt and select the option Run as Administrator.
- Access the folder: Copy the path where you have saved the downloaded file.
- Write the command: Adds the following text without quotes to the end of the path: speedtest.exe. Press Enter and the test will start automatically.
- Results: After a few seconds, you will get the download speed, upload speed and latency. In addition, it will provide you with a URL with the result that you can share if you wish.
Measuring speed with PowerShell
If you prefer to use PowerShell instead of CMD, it is also possible to perform the measurement in a few simple steps. This option is almost identical to the previous one and will give you very similar results.
First, download the tool. As in the previous case, you need to download the Ookla CLI from their website.
- Unzip the file– Extract the content to a location of your choice.
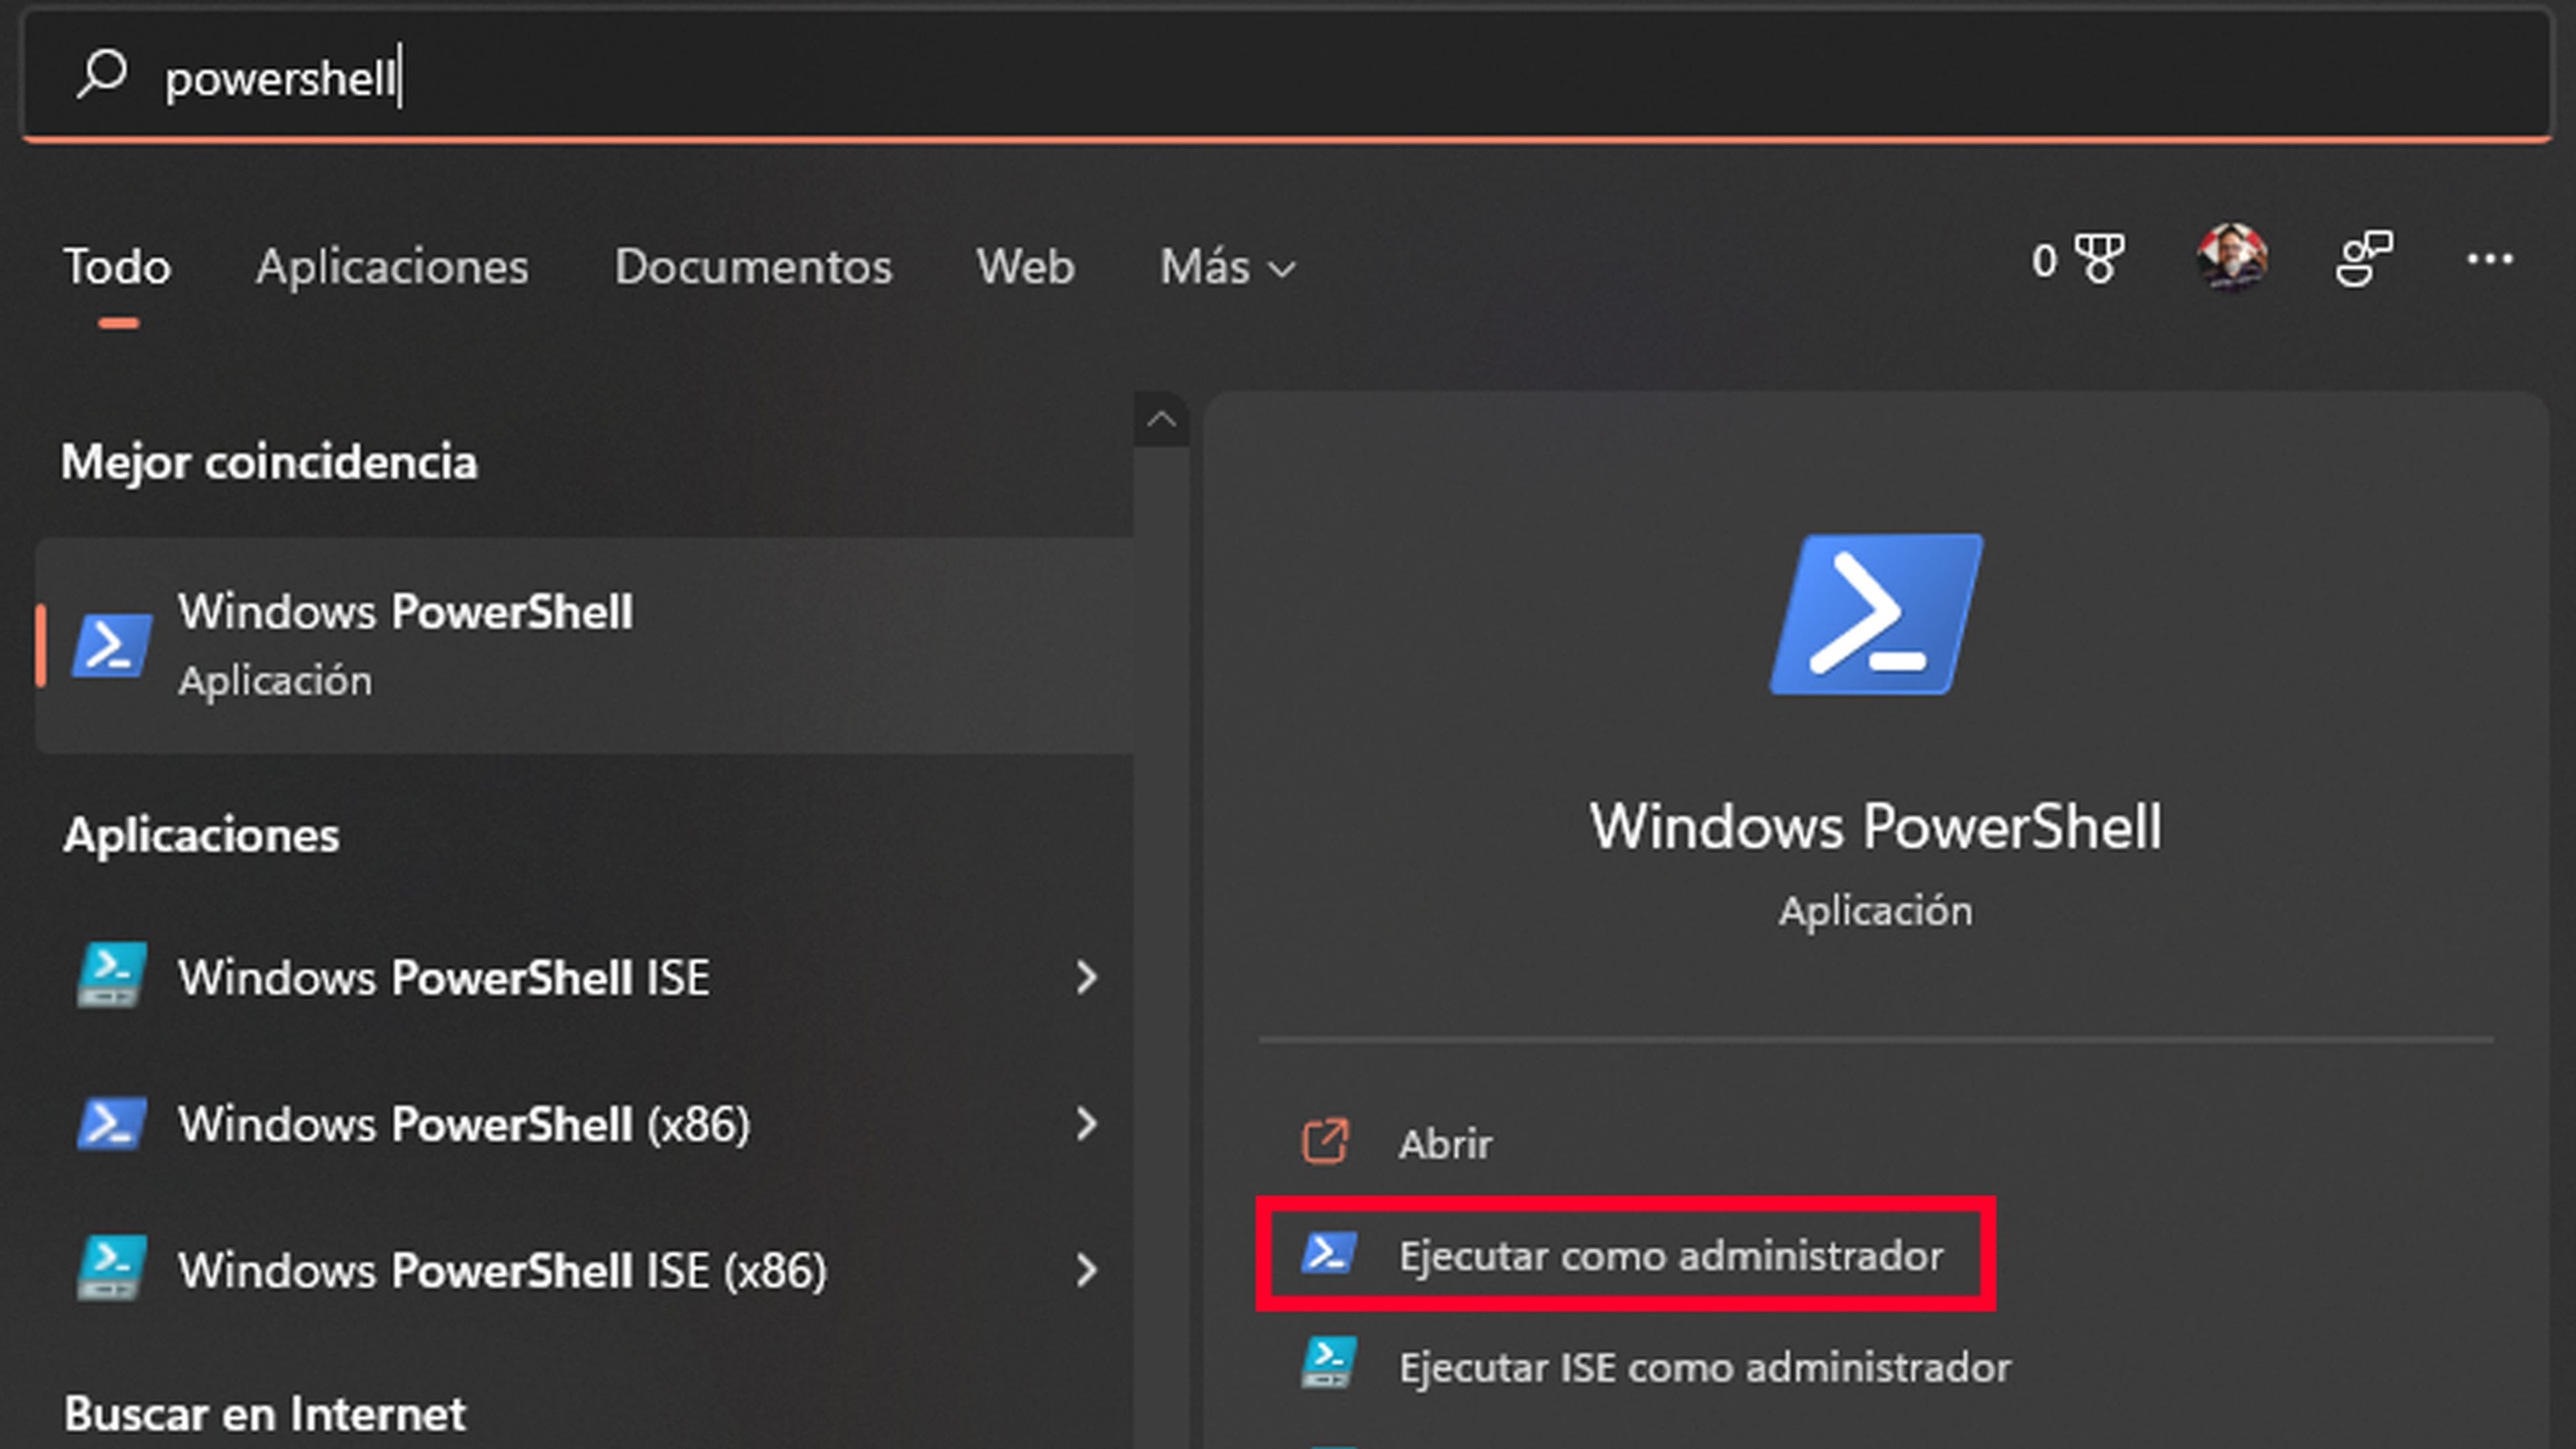
- Open PowerShell– Right click on the Windows icon and select Windows PowerShell (Administrator).
- Write the command: to run the test, use the & symbol followed by the path where you have saved the unzipped file, and at the end add speedtest.exe. Press Enter.
- Results– As with CMD, you’ll get information about your connection speed, latency, and other useful data. It will also provide you with a URL to share.
It is important to keep in mind that the speed these tools measure rarely matches the exact speed you have contracted. This is due to several factors, such as cable losses, connection quality, interference, and the operation of the devices you use. Therefore, It is normal that the results are a little lower than you expect.
In addition, it is essential to remember that connection speed may vary throughout the day. Factors such as network congestion, distance to the server, and other users connected to the same network can also influence the results.
Get to know how we work in ComputerToday.
Tags: Computers


Add Comment